
How do I apply for an SC?
- Planning Portal Login 1
- Subdivision Certificate Application 3
- If the Strata Subdivision was approved under DA, then locate the relevant PAN number and note this down
- There will be multiple approvals for the development, one for the subdivision and one for dwelling. Ensure that the reference number is for the subdivision CDC.
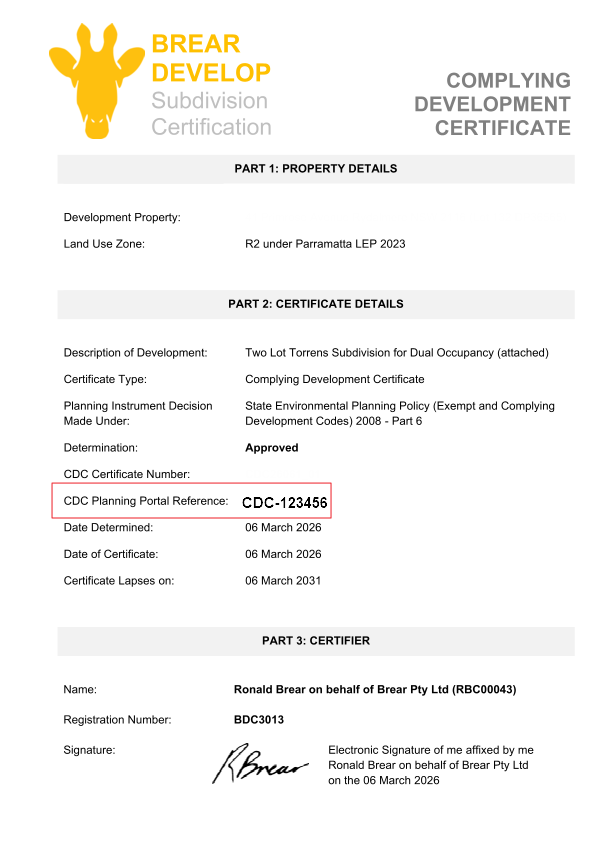
- Open your Complying Development Certificate (CDC).
- Scroll to Part 2: Certificate Details.
- Look for the line labeled “CDC Planning Portal Reference.”
- The reference number will appear next to this label (for example: CDC-123456).
- Upon clicking the icon, a drop-down list will appear. From the drop-down list, choose "Post Consent Certificate (CC, OC, SC, PCA, SWC)".
- Primary Applicant Details 21
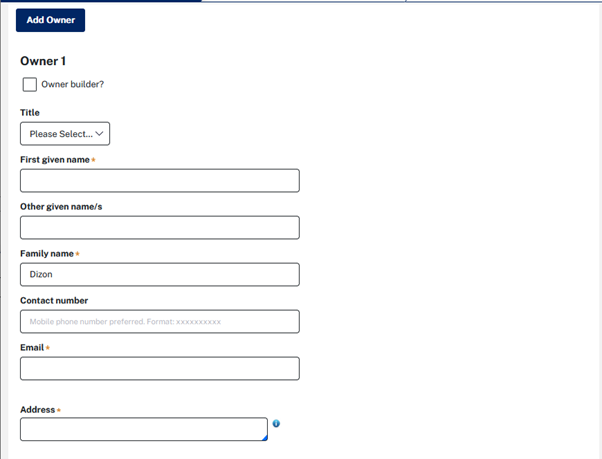
- If you are not one of the owners, you will be required to populate the contact information for all owners. You can add as many additional owners as required by click Add Owner.
- If a company or business own the development site, enter the company name.
- Development Details 28
- Principal Certifier Selection 34
- The files uploaded are not important. Just upload blank documents.
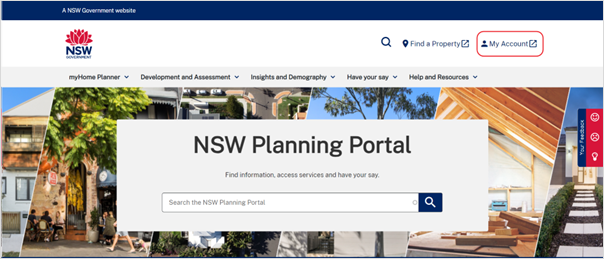
Navigate to the NSW Planning Portal website.
2
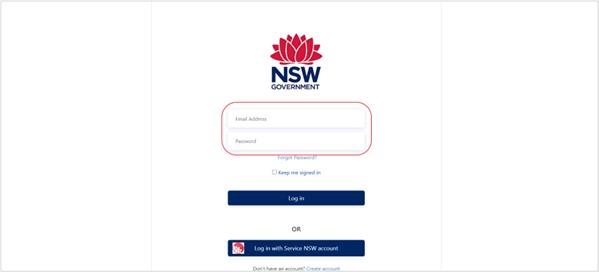
Once on the website, select "My Account" and log in. (Note: If you do not have an account yet, please create an account.)
Prior to the application, locate the Planning Portal CDC Subdivision Reference Number and take note of the reference number.
To locate the CDC Planning Portal Reference, please follow these steps in your Complying Development Certificate (CDC) document:
Please use this reference number when accessing or searching the project in the NSW Planning Portal.
Click on the "New" button positioned at the upper left corner of the page adjacent to the NSW Planning Portal logo.
 5
5
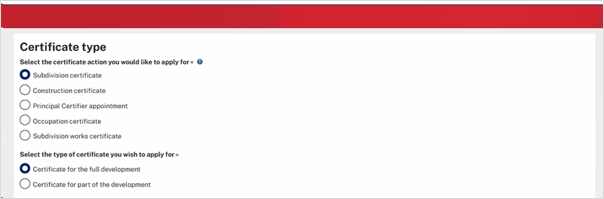
Select Subdivision Certificate as the certificate action you would like to apply.
6
Choose "Certificate for the full development" as the type of certificate.
 7
7
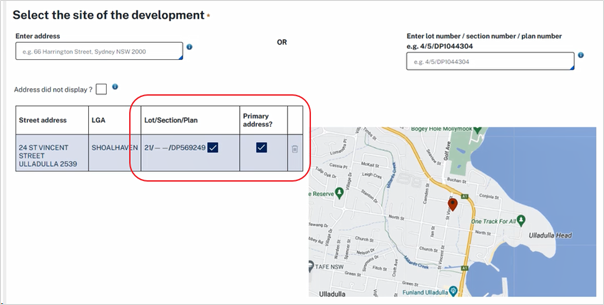
Enter the site of your development using the address. Repeat as required until all development sites are located.
 8
8
Tick the Lot/Section/Plan and the Primary Address. (You can delete the address if it is incorrect by clicking on the trash icon.)
 9
9
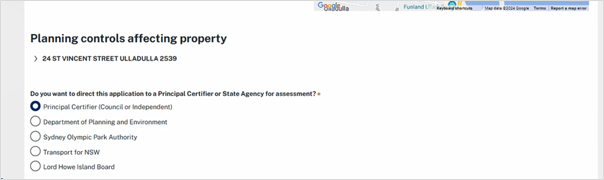
Select Principal Certifier (Council or Independent) to where the application will be directed.
 10
10
Choose the related approval for development. It can be Complying Development Certificate (CDC) or Development Application (DA) number.
 11
11
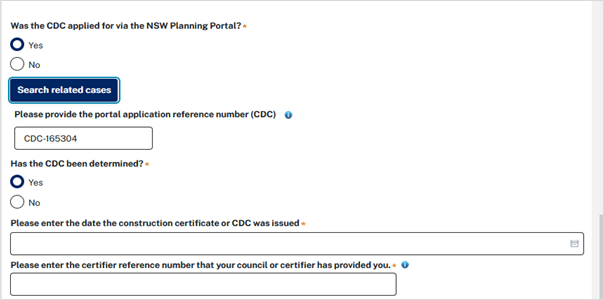
If you selected CDC, and this is applied through NSW Planning Portal, kindly select "Yes."
12
Input the Planning Portal CDC Subdivision Reference Number you have taken note of.
13
Select "Yes" for the CDC has been determined question.
14
Enter the date that the CDC was issued.
15
Enter the CDC number provided by your certifier.
 16
16
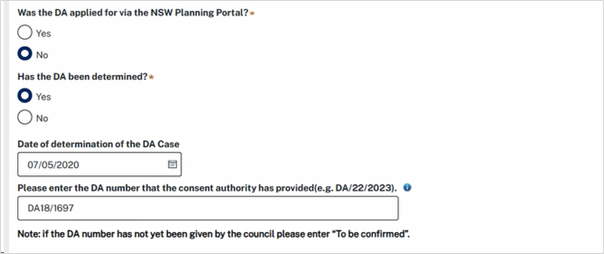
If you selected DA, select "No" for the planning portal question.
17
Select "Yes" for the DA has been determined question.
18
Enter the date of determination of the DA case.
19
Enter the DA number that the consent authority has provided.
 20
20
Click "Next."
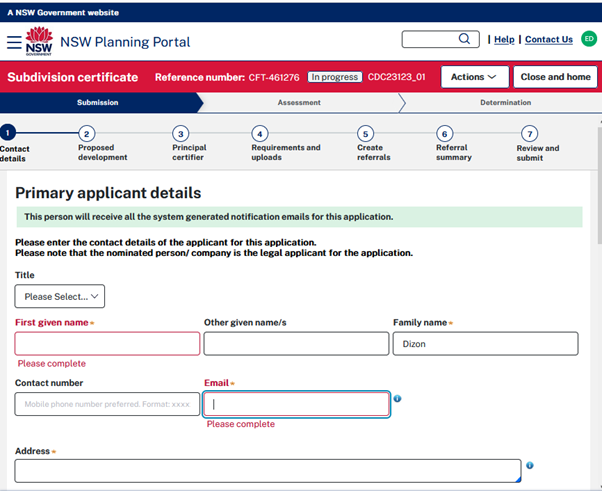
Fill in the applicant's details. Enter as required.
 22
22
Select "No" for the question if applicant is a business or company.
 23
23
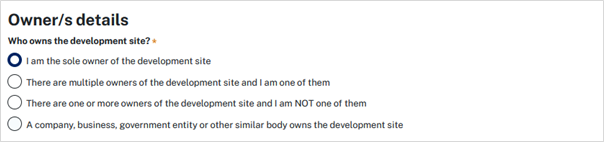
Identify the owner/s of the development site. Select which applies for the owner/s details.
 24
24
If there are multiple owners, select the appropriate button and click 'Add Owner'.
 25
25
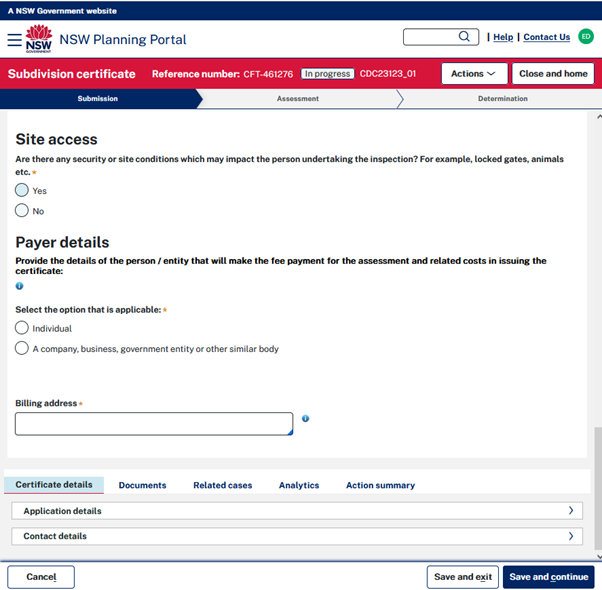
Select "No" for Site Access.
26
Select "Individual" for payer details. Applicant details will auto-populate.
27
Click "Save and Continue."
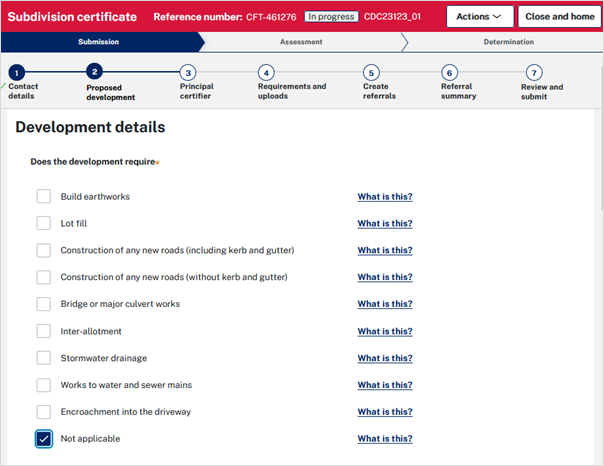
Select "Not Applicable" for the Development requirement.
 29
29
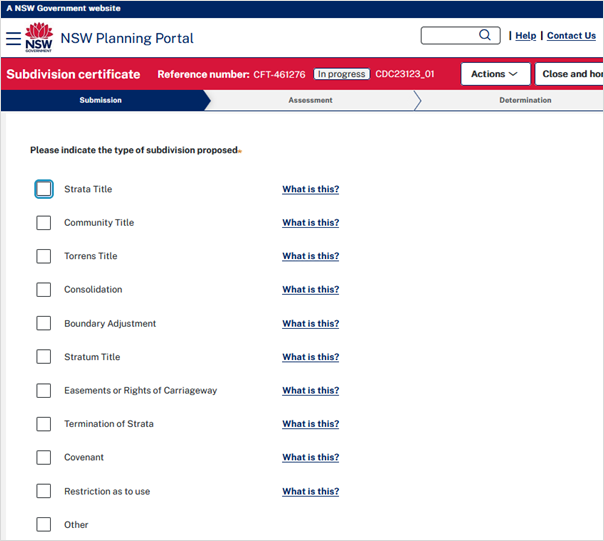
Select the type of Subdivision proposed you are applying for. Tick Torrens or Strata.
 30
30
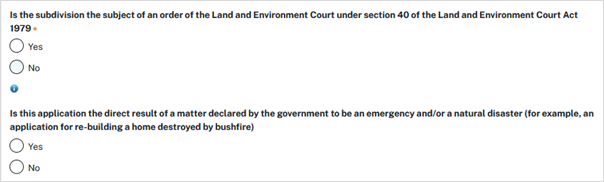
Select "No" for the following questions.
 31
31
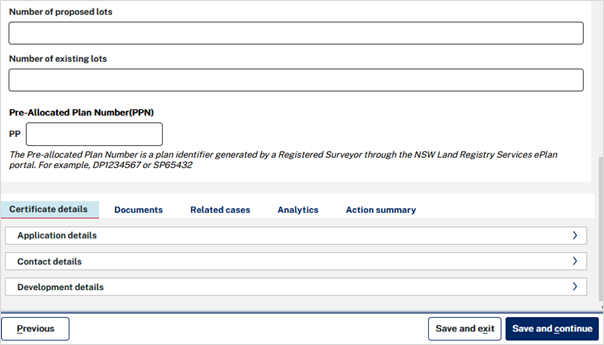
Enter the number of existing lots and proposed lots.
32
Leave the Pre-Allocated Plan Number (PPN) blank.
33
Click "Save and Continue."
Type the name "Brear" as your nominated certifier in the field and the information will appear on the page.
35
Select "Brear Pty Ltd".
36
Click "Save and Continue."
 37
37
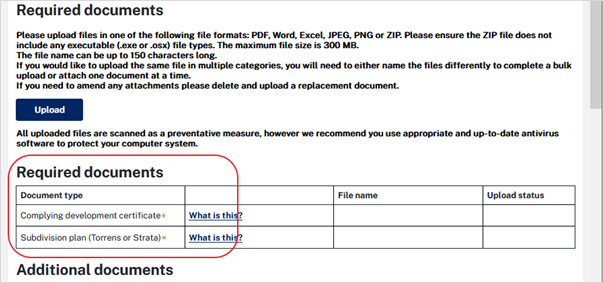
Upload the required documents. Note that Brear Develop already has all the required documents, however there are also additional documents you may neet to upload to complete your application.
 38
38
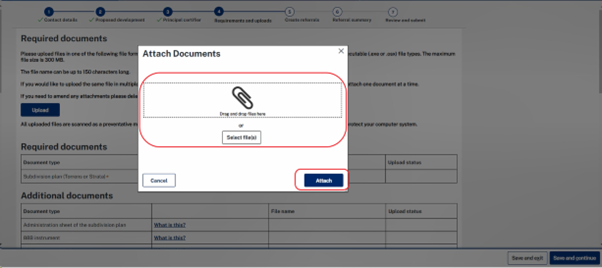
Click "Upload" and select or drag and drop files. Categorise the file type before clicking "Attach".
39
Click "Save and Continue."
 40
40
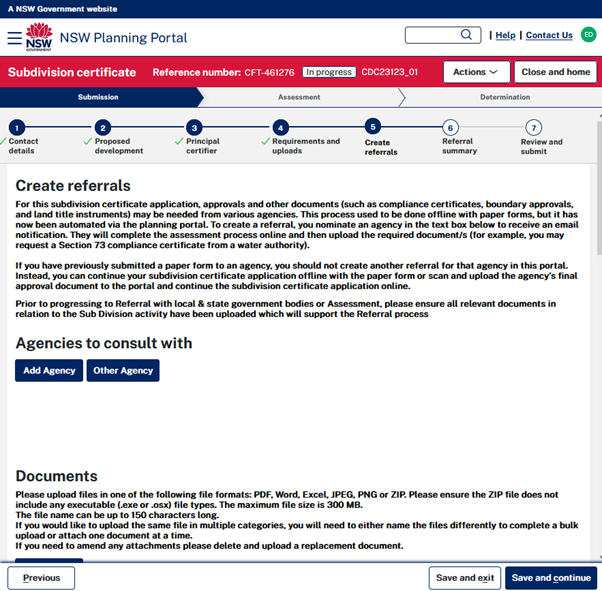
No need to put anything on the Create Referrals page. Just click "Save and Continue."
 41
41
On the last page of the application, review all the details you have entered.
42
After reviewing all information on the application, complete the declarations. Click "Select all" to the applicant declaration.
43
"Submit" the application.
